


Few indicators of my mental well-being are as reliable as my sourdough starter. When I am in a rut, its energy matches mine. Slow to rise in the morning, perhaps a bit too sour, and incapable of becoming what it’s meant to be.
Like many of my friends and seemingly everyone on the internet, the shelter-in-place era of the pandemic was ripe with the ingredients for a sourdough bread baking hobby: time, proximity to the oven, and boredom.
While it might not have been the most romantic way to fall into a hobby, I found myself on a quest to produce the perfect loaf. Naive and overconfident, the ideal loaf quickly proved even more elusive than it was subjective. With three years and countless loaves behind me, I can now say that I’ve gotten a bit closer to the loaf of my dreams. I can also confirm that bread baking is an excellent lesson in noticing and the patience and practice of cooking.
Bread is perhaps the most primal of foods. Composed of just flour, water, microbes, and salt, it appears, at first glance, just a matter of taming four basic ingredients. Bakeries with excellent bread would not be so hard to find if it were that simple. In my opinion, even legendary bakeries that have long stood as pillars of the divine loaf have lost some of their specialness with expansion and success. The reality of bread baking is that it is an intimate process, requiring attention, planning, thought and noticing. The larger an operation gets, the more difficult it becomes to pay attention to it all. Yet, with the right tools, a baker can produce loaves in their kitchen that rival the best in the world. All the more reason to bake at home!
You might be inclined to follow a recipe when you first start baking sourdough. In that recipe, you would likely be given specific instructions about the timing of feeding your starter, precise ratios of flour to water (hydration), and strict adherence to some super philosophy like “no kneed.” You might also follow that recipe perfectly and end up spreading your morning jam on a tart plank. Understanding the mechanics behind a loaf of bread would probably convince you that following someone else’s recipe is like navigating an ocean vessel by following the stars - useful to someone who knows what they are doing but foolish for a novice. The reality of this hobby is that it demands attention and focus. What at first might seem laborious and intimidating can be viewed as a form of meditation. The process of perfecting a long and complex cooking project can be a means of deriving confidence, routine, and respect for a constantly permuting ritual. If you want a detailed guide to bread baking, I recommend Chad Robertson’s Tartine Bread. Otherwise, here are some things I’ve learned on my bread-baking journey.
The Starter
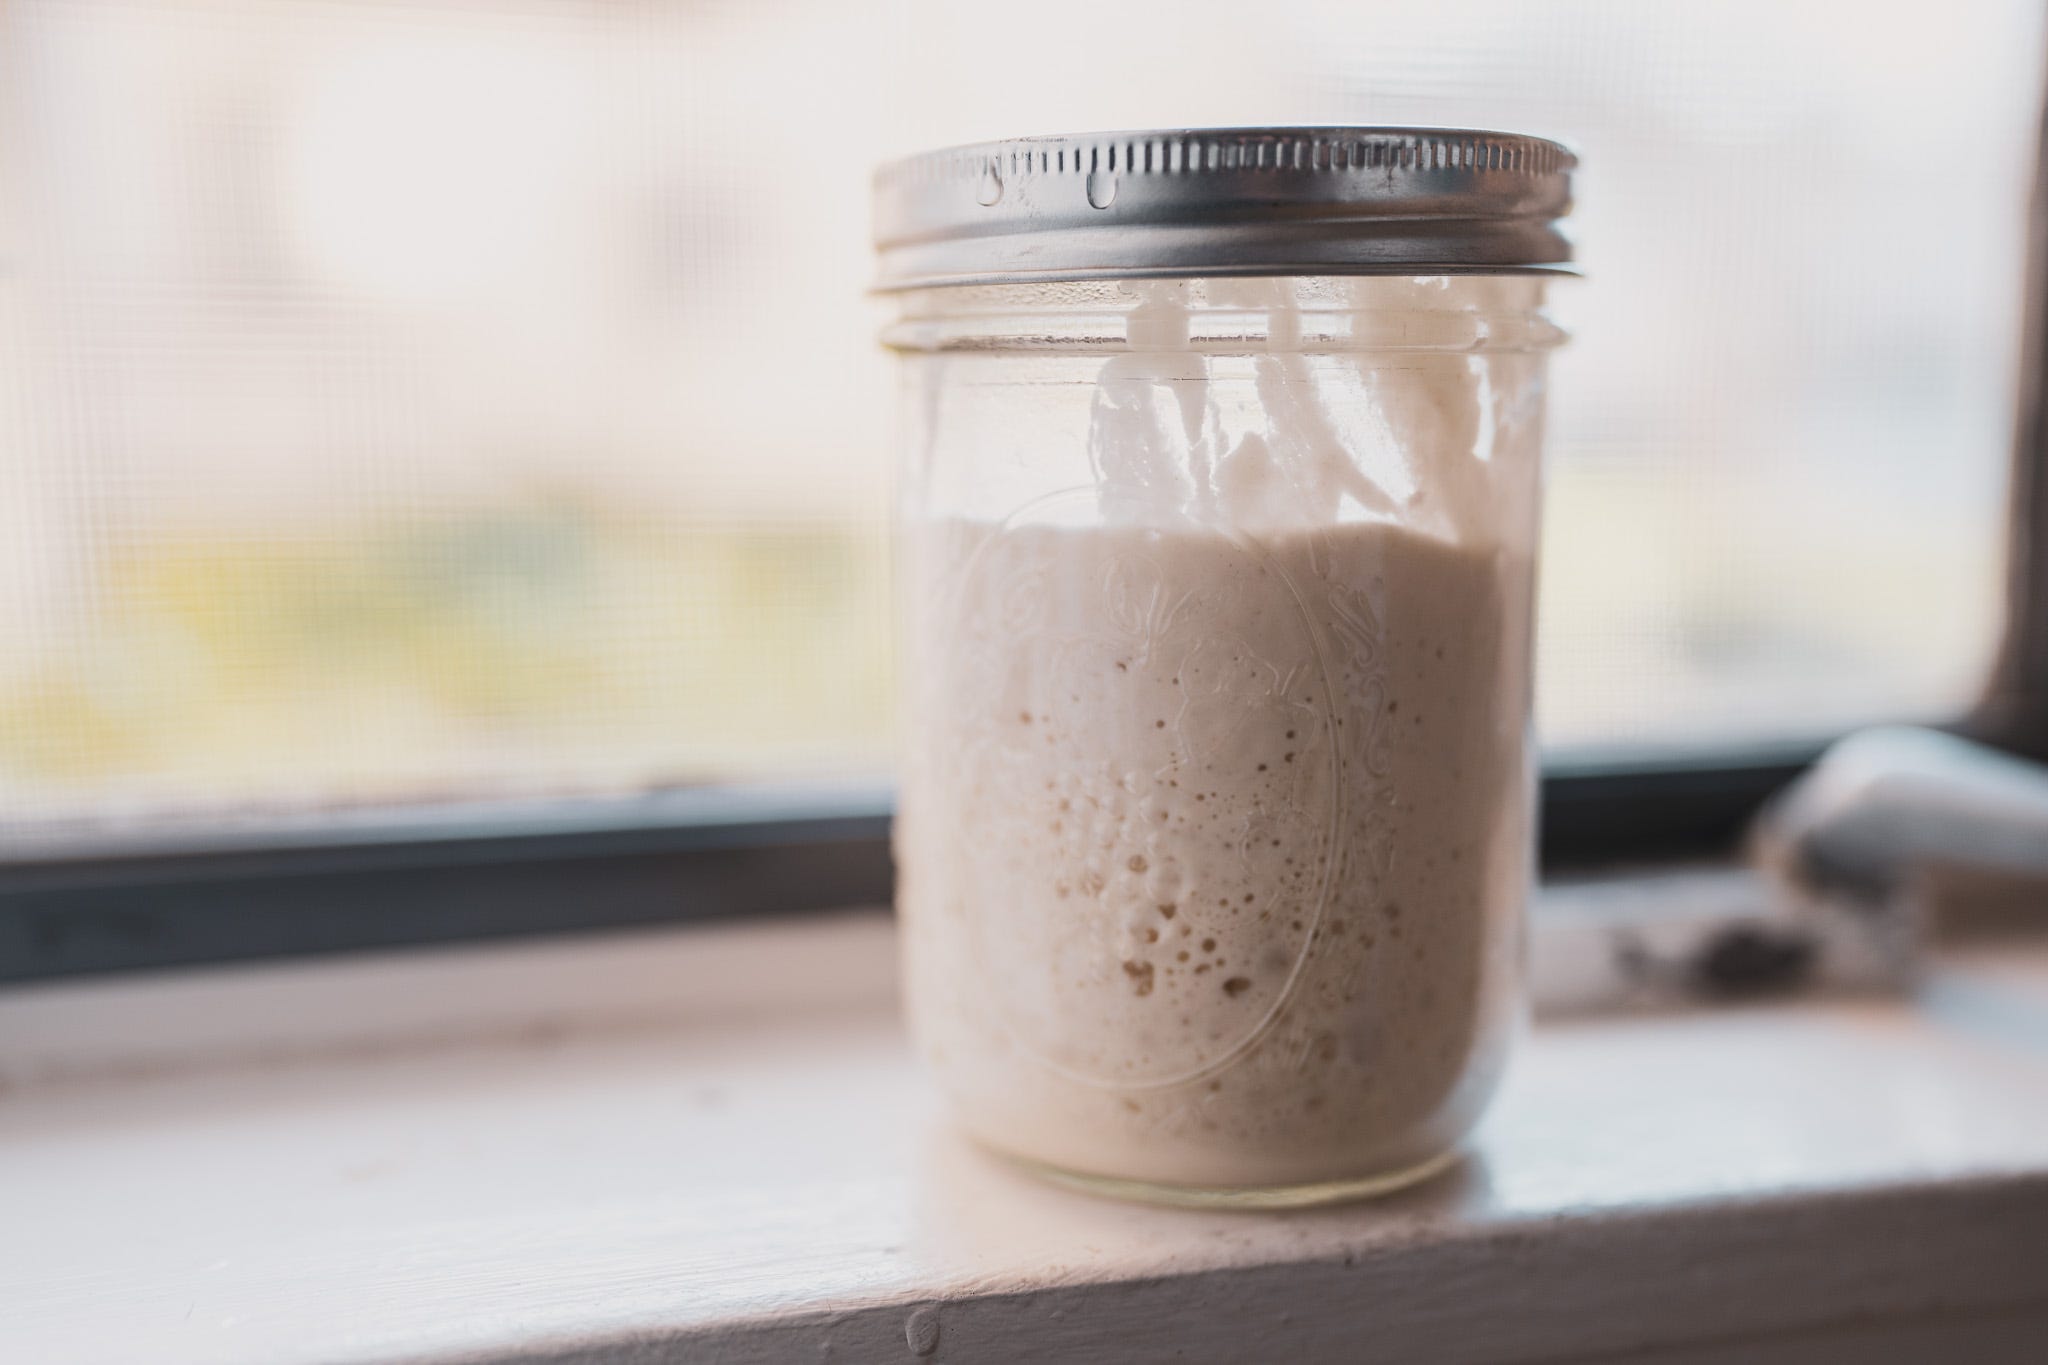
The heart of sourdough bread is its starter. A strong starter yields an active and flavorful loaf that rises in a reasonable amount of time and comes out of the oven standing tall. The starter is full of wild yeast (fungi that exist in flour and in your kitchen) that want nothing more than to be fed a healthy diet of wet carbohydrates. To create a starter from scratch, you must activate the yeast already present in the flour and in your environment. Combining equal parts by weight of whole-wheat flour and lukewarm water gives you a goop that will slowly come alive on your counter. Bubbles will form, and you will notice a natural cycle of breath. Over a few days, you will detect an increase in volume and a sour flavor and aroma. Once it is noticeably active, discarding half of the mixture and replacing it with a 50/50 mix of water and all-purpose flour gives the yeast more to eat; in doing so, they breathe out carbon dioxide. This is what produces the starter bubbles and what will eventually cause your bread to rise. After the microbes have consumed all those newly added carbs, the bubbles will deflate. A healthy starter rises and falls predictably.
The Leaven
Leaven is the stuff we actually use to make our bread rise. Many sourdough recipes go off the rails when they equate starter with leaven. While it is possible and may be easier to use starter as a leaven, the sour, acetic acid-dominated starter will impart a tang that departs from the sweet, floral, and soft flavors of a properly crafted leaven. Creating a leaven involves feeding a small portion of starter (usually around two tablespoons) a healthy dose of 50/50 flour and water. Overnight this mixture grows in volume slightly, fills with enough gas to float in water, and becomes rich with the active yeast you’ll need to leaven your loaf. Importantly, because it is young and fresh, it does not yet have high concentrations of acetic acid and will impart a more pleasant flavor to your bread than would a pure starter.
Mixing
After you’ve created a healthy starter and leaven, you are ready to put them to use. The proofing process is just as critical to a good loaf as a strong starter. It is also even more sensitive to your environment. What has worked for me in Davis has not worked similarly in Berkeley, a testament to paying attention and understanding the mechanics so you can tweak your process. Hydration refers to the ratio of water to flour in your dough. A bread that is 100% hydrated is as wet as your starter and contains equal parts water to flour. Experimenting in the region of 70% flour is a good jumping-off point. Most bakers agree on the region of 2% salt. I usually use about 20% leaven, and 10% alternative/whole wheat flour. These are all baker’s percentages; adding them will not get you to 100%. I start with the leaven and water in a mixing bowl, stir, then add my flour. I give this mixture 30 minutes once combined to develop some structure. I then add salt and a touch more water (50g or so). Once it is all combined, it is time for the bulk ferment.
Bulk Ferment
The first ferment or rise in the process is called the bulk ferment. In this stage, the dough develops flavor and strengthens its gluten networks. It should take about four hours at 78 degrees. I try to turn the dough and fold and stretch it every half hour or so during this stage. This helps develop structure and strength that will make the dough rise and spring in the oven. Once the small peaks and valleys that appear due to stretching and folding begin to hold their shape, the dough is ready for a bench proof.
Bench and Final Proof
Removing the dough from whatever vessel it is contained in and laying it on a lightly floured surface, you should now split the dough into desired loaf sizes (if applicable) and develop tension through as few movements as possible. Folding the dough over itself in multiple directions allows it to form surface tension without tearing. The dough may now rest on the counter for a half hour or so until the final proof. Flip the dough so that its smooth side now sits against the counter. Next, pull and stretch the dough from four sides and fold them back over your dough ball, creating a nice tight package. You’ll want to then place this package smooth side down into a banneton. After about 4 hours at warm room temp, or 8-12 in the fridge, your bread should be ready to bake.
Baking
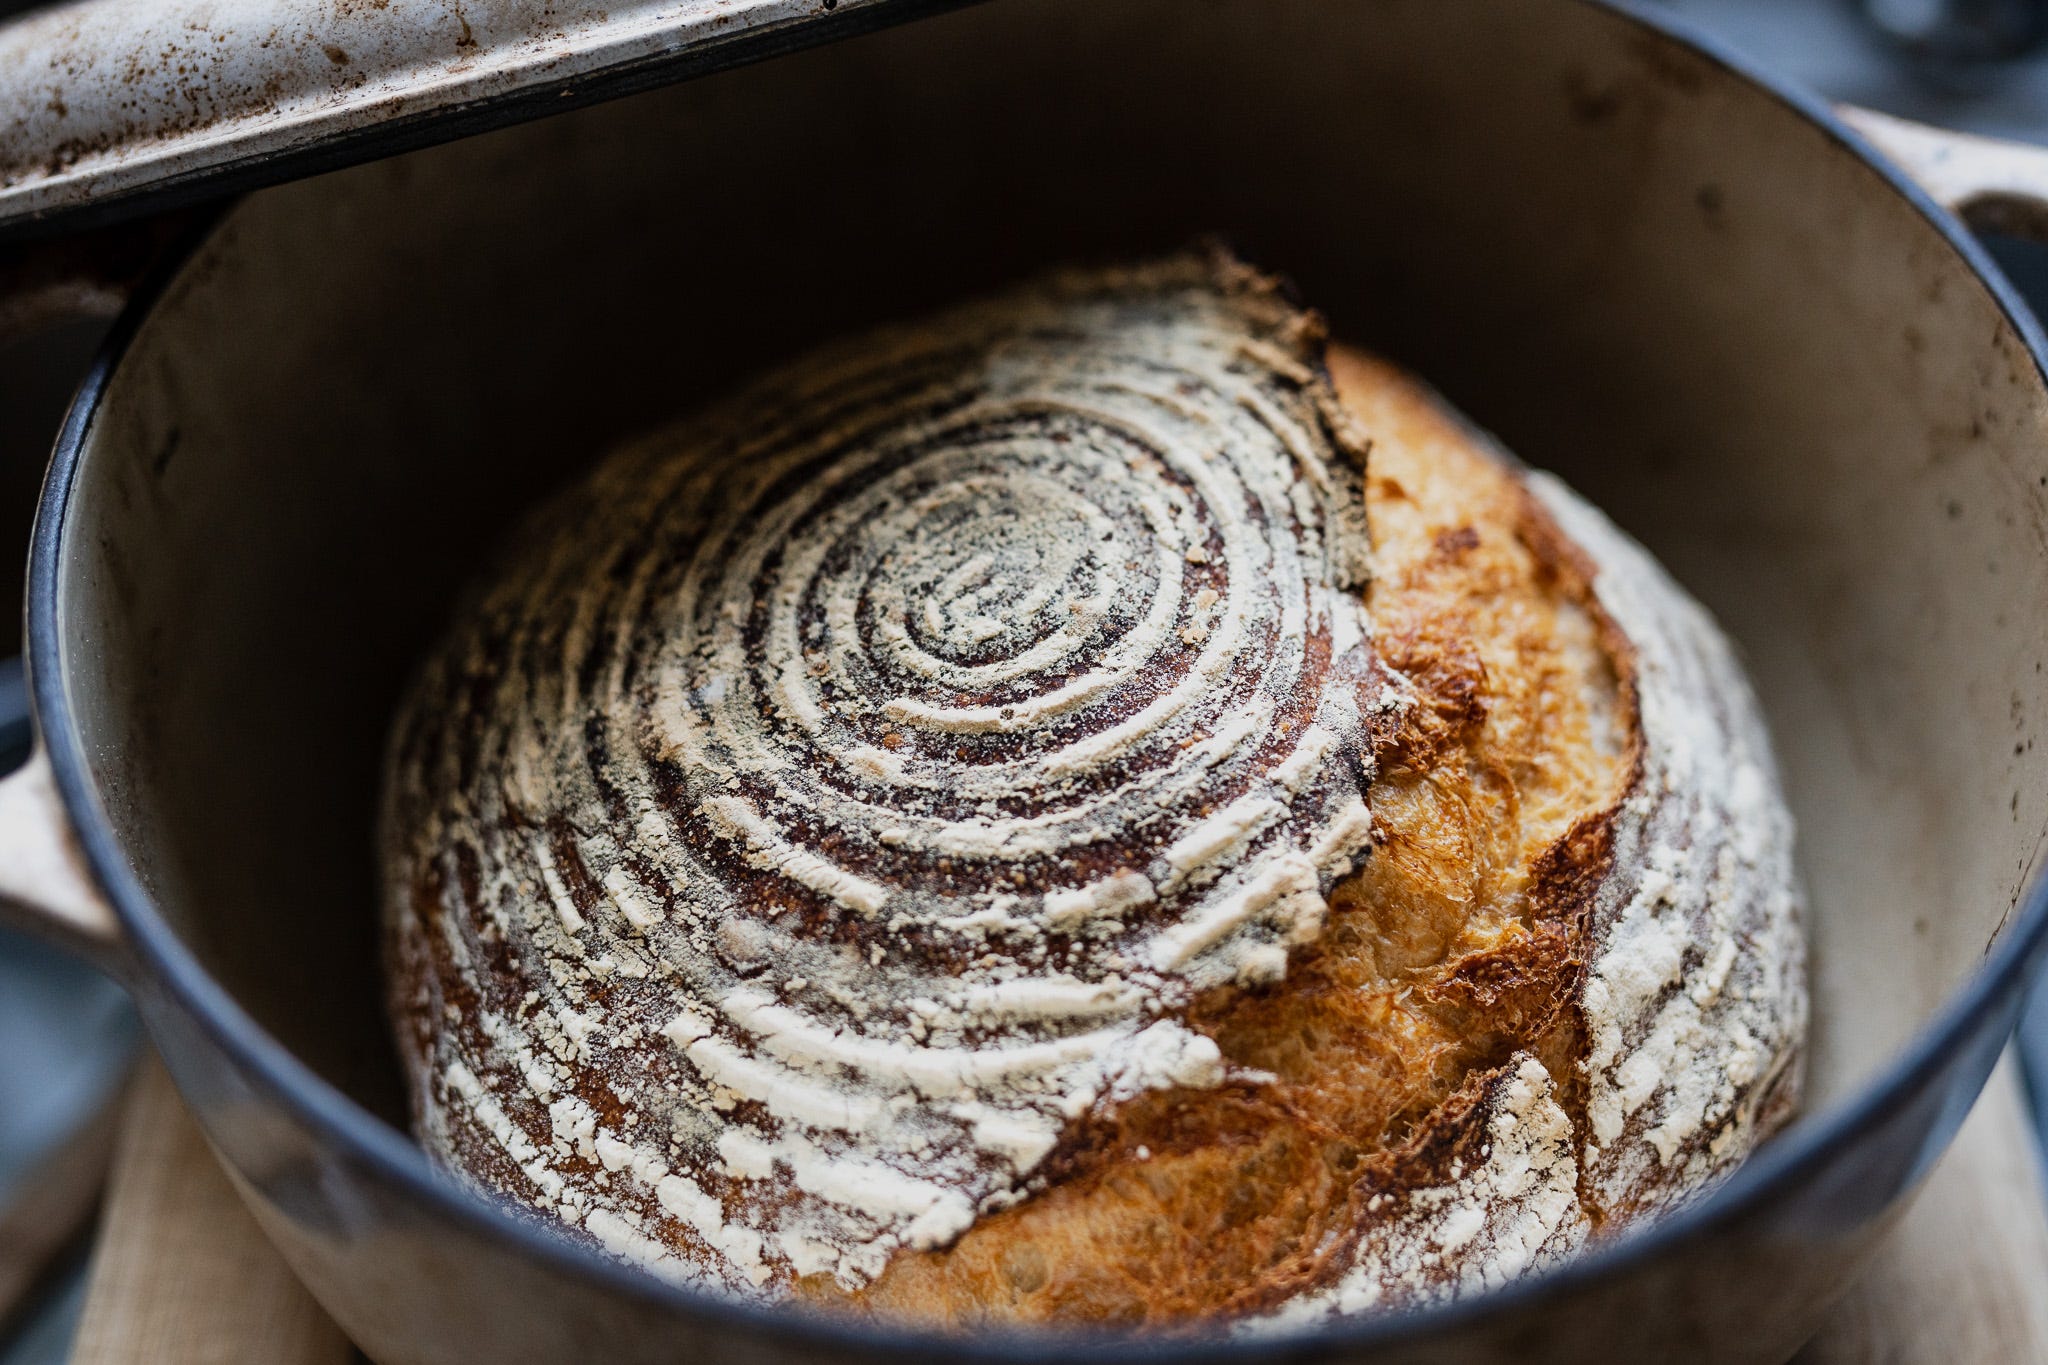
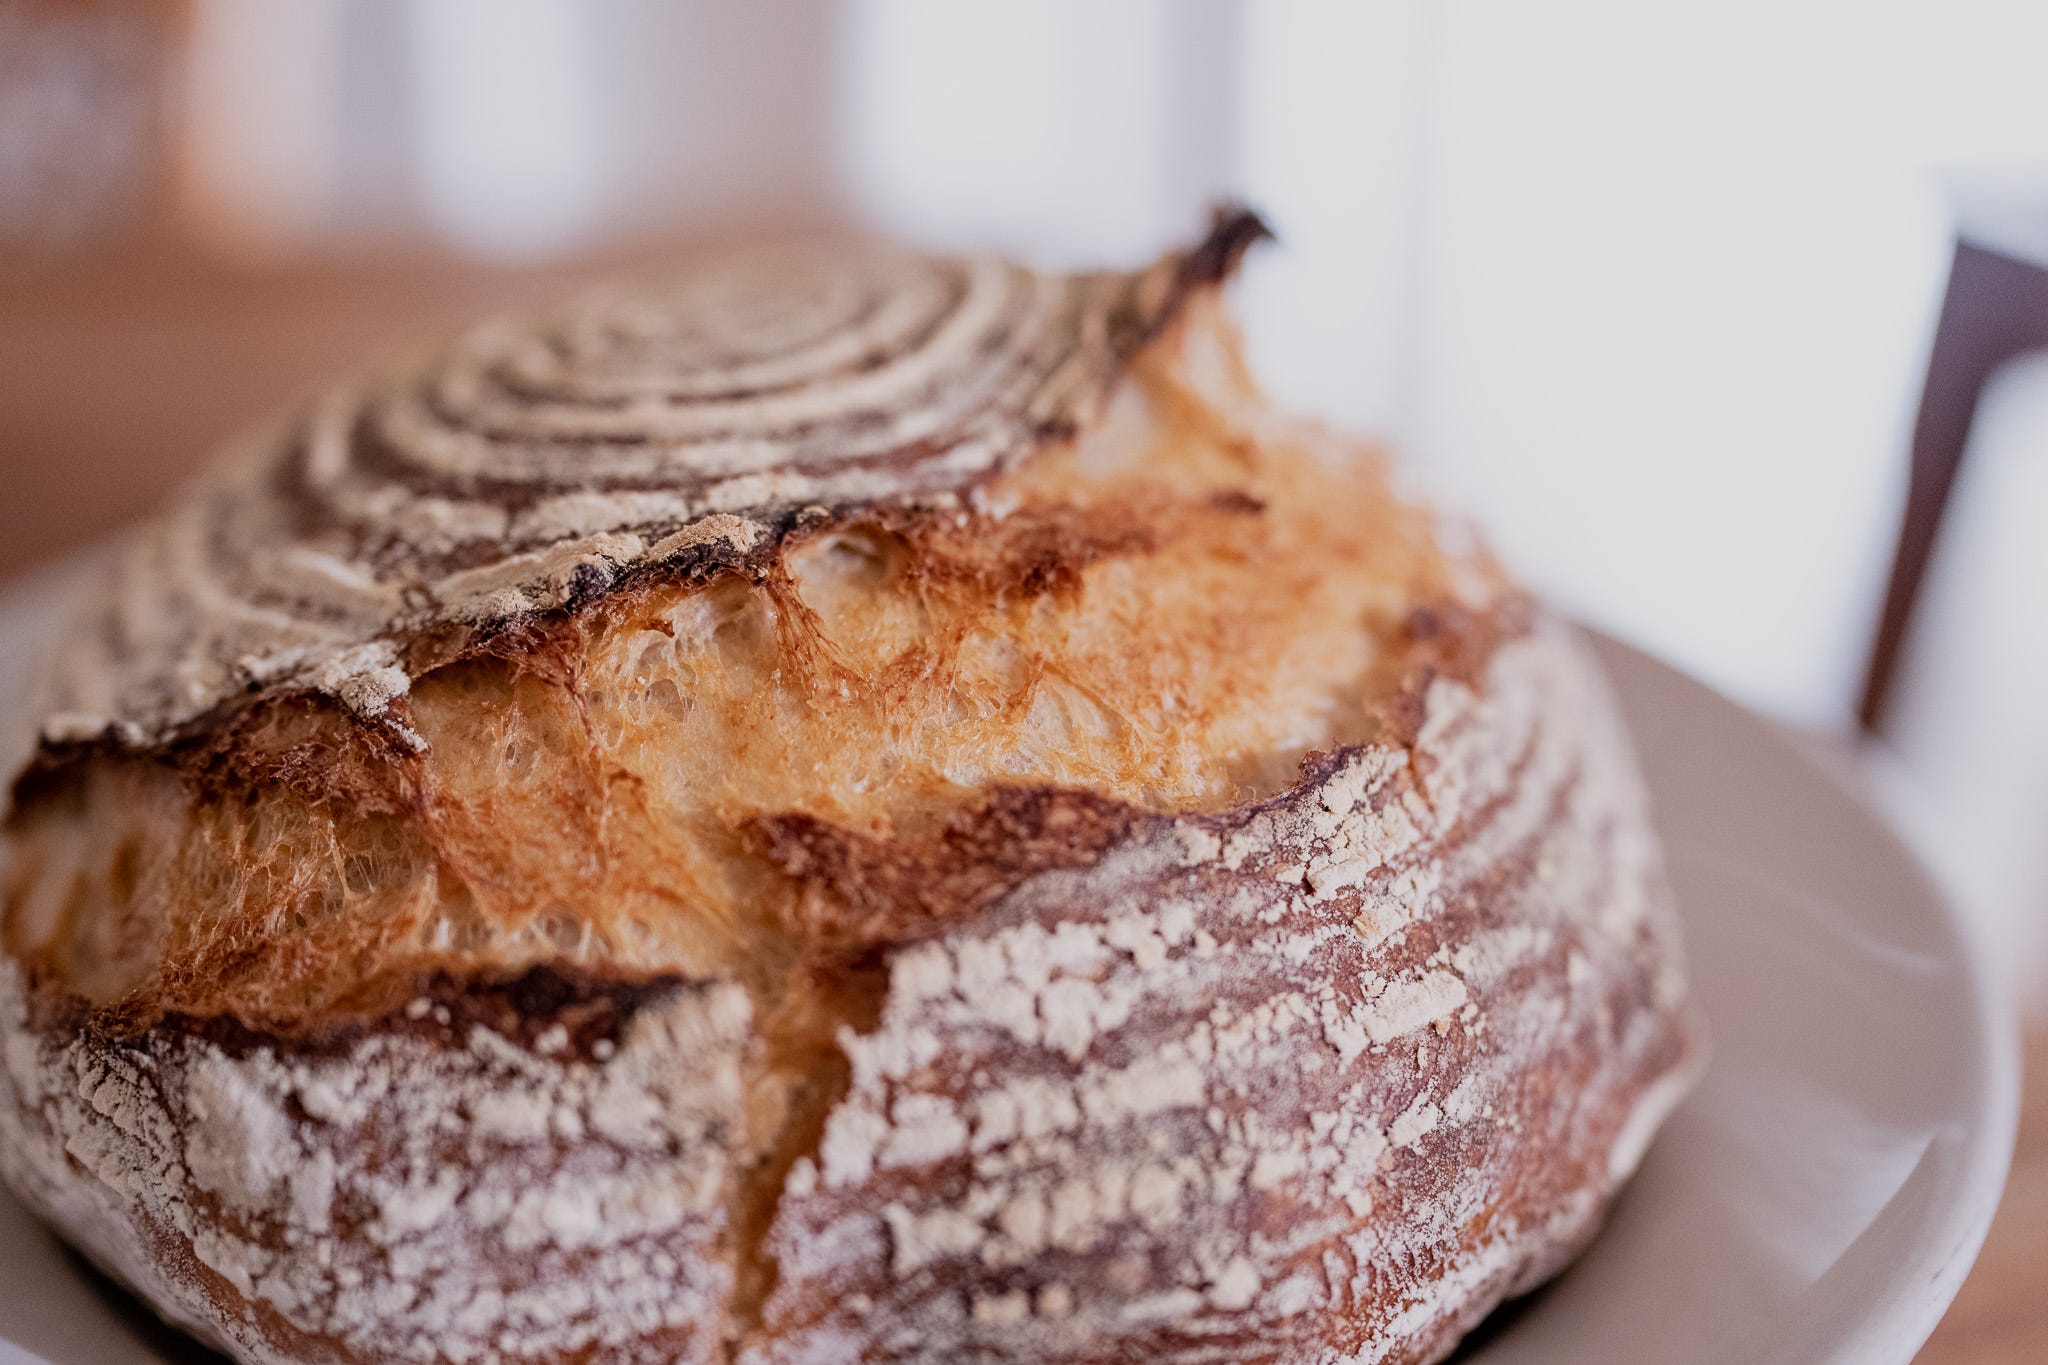
A half-hour before you plan to bake, place a lidded dutch oven or cast iron combo cooker in the oven. Preheat the oven to 500 degrees. Once the oven is at temperature, you'll want to carefully flip your bread basket onto parchment paper or directly into the dutch oven (I recommend the former). Use a sharp blade to score its surface (I like a long single angled score which yields a nice ear) and replace the lid before putting the bread in your hot oven. I bake for 20 minutes at 500 degrees, then remove the lid, lowering the temperature to 450 for a final 20-25 minutes; until your crust is a dark caramel-colored brown.
Resting and Eating
For added crustiness, after freeing it from the dutch oven, set your loaf to cool on an oven rack with the oven off and door ajar. Allow it to cool sufficiently before slicing and eating, and be sure to relish your accomplishment. Regardless of how shabby your first few loaves might be, you are on a commendable path toward perfecting something. The process of honing your bread-baking skills rewards patience and practice, elements of cooking that pay dividends in anything you make. I recommend taking notes, reflecting on each step, and experimenting. Understanding the mechanics and process for you and your environment will take more than a read of this post or any writing on baking. While it may be daunting, all you have to do to improve your bread is pay attention.